Create Live Folders in Windows 10 Start menu
- Open Windows 10 Start menu.
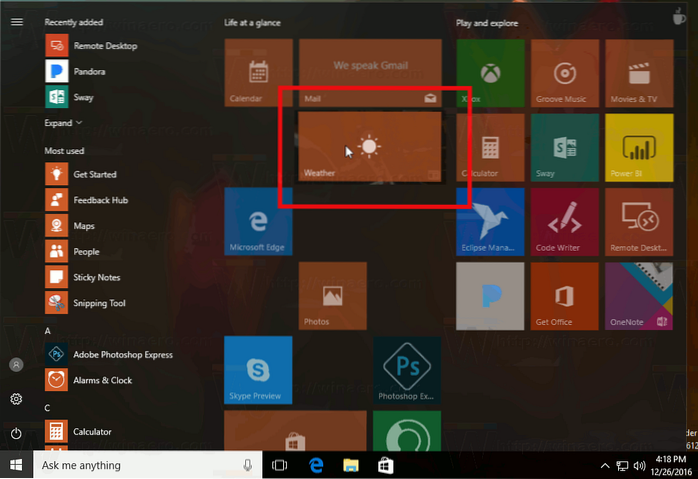
- Click and drag a tile and drop it over another tile you want to place in one single folder.
- The result will be a “live folder” which is automatically created. To collapse the live folder, simply click the chevron.
- How do I customize the Start menu tiles in Windows 10?
- How do I tile folders in Windows 10?
- How do I add remove and customize tiles to Windows 10 Start menu?
- How do I add a folder to the Start menu in Windows 10?
- How do I get a traditional Start menu in Windows 10?
- How do I create a shortcut to tiles in Windows 10?
- How do I change Windows 10 tiles to classic view?
How do I customize the Start menu tiles in Windows 10?
Just head to Settings > Personalization > Start and turn on the “Show more tiles on Start” option. With the “Show more tiles on Start” option on, you can see that the tile column has expanded by the width of one medium-sized tile.
How do I tile folders in Windows 10?
To create a tile folder in Start, just drag one tile on top of another for a second, then release. Continue dropping as many tiles into the folder as you'd like. When you expand the folder, you'll see a new option to name it. If you like this, check out more Windows 10 Tips.
How do I add remove and customize tiles to Windows 10 Start menu?
Add, rearrange, and resize live tiles
Pop open the Start menu, then click All apps. Find the app you want to pin to the Start menu; right-click it, then select Pin to Start. That app's icon will now appear at the bottom of the live tiles pane. An assortment of live tile sizes.
How do I add a folder to the Start menu in Windows 10?
Add Folder Locations to Windows 10 Start Menu. To add or remove locations on the Start menu, head to Settings > Personalization > Start. The easiest way to get there is to right-click the desktop and then Personalize. Next scroll down and in the left panel click Choose which folders appear on Start.
How do I get a traditional Start menu in Windows 10?
To make the Start screen the default instead, click the Start button and then click the Settings command. At the Settings window, click the setting for Personalization. At the Personalization window, click the option for Start.
How do I create a shortcut to tiles in Windows 10?
Open your Start menu and you'll see the website shortcut you added under “Recently Added” at the top left corner. Drag and drop the website to the right side of your Start menu. It'll become a shortcut tile, and you can position it anywhere you like.
How do I change Windows 10 tiles to classic view?
You can enable Classic View by turning off "Tablet Mode". This can be found under Settings, System, Tablet Mode. There are several settings in this location to control when and how the device uses Tablet Mode in case you are using a convertible device that can switch between a laptop and a tablet.