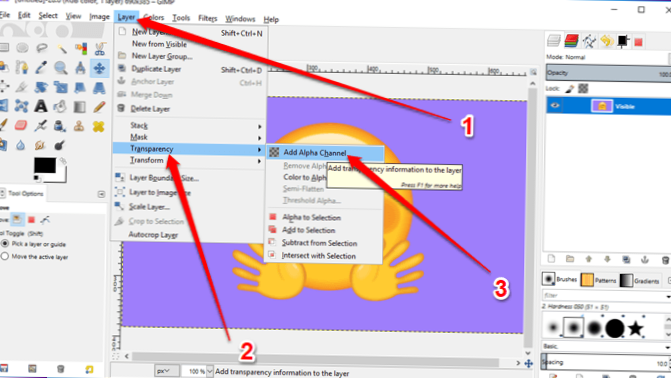
Open the image in GIMP. You should have the layers window visible. Select the layer that the image is on, right-click it, and from the context menu, select 'Add Alpha channel'. Now, when you erase part of the layer it will be transparent.
- How do you add transparency in gimp?
- Does gimp support transparency?
- How do you make a whole picture transparent?
How do you add transparency in gimp?
How to make a transparent background/selection on an image using GIMP
- Open your image.
- Select the area you want to make transparent. ...
- In the Layer window (the one showing your image), select Layer – Transparency – Add Alpha Channel.If this is blanked out then it's already done. ...
- Select Edit – Clear. ...
- Save the file.
Does gimp support transparency?
GIMP comes with standard filters that supports creating gradients; look under Filters+Light and Shadow. You are only limited by your imagination. To demonstrate the capabilities of alpha transparency, a soft glow in the background around Wilber is shown.
How do you make a whole picture transparent?
Select the picture for which you want to change the transparency of a color. On the Format Picture tab, click Recolor, and then select Set Transparent Color. Click the color in the picture or image that you want to make transparent. Note: You can't make more than one color in a picture transparent.