- How do I get the Notepad ++ plugin manager?
- What is Notepad Plugin Manager?
- How do I install Notepad ++ plugins?
- What is Plugin Manager?
- How do I install a plugin?
- How do I install compare plugins?
- How do I change Notepad to default settings?
- How do I download JMeter Plugin Manager?
- How do I know what version of Notepad I have?
- How do I enable notepad?
- What plugin means?
- How do I install Notepad?
How do I get the Notepad ++ plugin manager?
A built-in Plugin Manager is in progress, and I will do my best to ship it with Notepad++ ASAP.
...
To install a plugin without Plugin Manager:
- Download your plugin and extract contents in a folder. You will find a . dll file inside. Copy it.
- Open C:\Program Files (x86)\Notepad++\plugins and paste the . dll.
- Run Notepad++
What is Notepad Plugin Manager?
Plugin Manager is a plugin for Notepad++ that allows you to install, update and remove plugins from the source code editor. A centrally hosted XML file holds the list of plugins, that the plugin manager downloads and processes against the list of installed plugins.
How do I install Notepad ++ plugins?
Place the plugin. dll file under plugin folder of notepad++ installation. For me it was : C:\Program Files\Notepad++\plugins. Go to Notepad++ then : Settings -> Import -> Import plugin (import the plugin).
...
- Download the plugin you wish to install. ...
- Extract to a local folder (e.g. using 7-zip or similar).
What is Plugin Manager?
To open the manager, click Plugins on the toolbar. ... You can use the plugin manager to install, remove, and manage your extension plugins. The plugin manager has two tabs. You can find all plugins that you can install automatically on the Available tab and all installed plugins on the Installed tab.
How do I install a plugin?
To install a plugin you just need to put the plugin files into the wp-content/plugins directory. Once a plugin is installed, you may activate it or deactivate it from the Plugins menu in your WP administration. In WordPress 2.7 and above you can install plugins directly from the admin area.
How do I install compare plugins?
Install Notepad++ Compare plugin
- Start your Notepad++ as administrator mode.
- Unzip Compare-plugin in temporary folder.
- Import plugin from the temporary folder.
- The plugin should appear under Plugins menu.
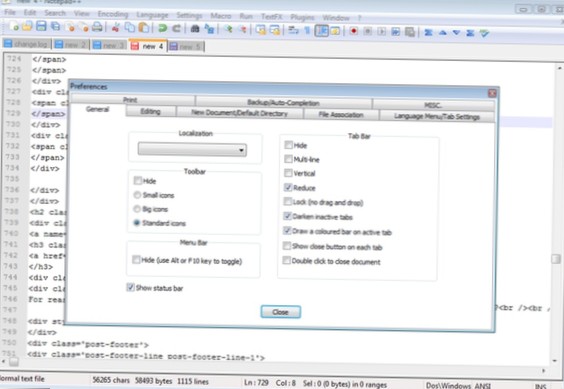
How do I change Notepad to default settings?
It is easy to do using the following steps:
- Go to settings.
- Go to style configurator.
- Then you can see there is an option call select theme.
- Select default theme and save it.
- Close the notepad and restart.
How do I download JMeter Plugin Manager?
Download the Plugins Manager JAR file and put it into JMeter's lib/ext directory. Then start JMeter and go to "Options" menu to access the Plugins Manager. The label on the menu item will say "has upgrades" in case any of your installed plugins have upgrades for it.
How do I know what version of Notepad I have?
Open Notepad++ text editor. Now click on the ? (question mark) in the menu option next to Window. Now choose About. You should see a pop-up window where you can know the version detail, mine is 32-bit as you see!
How do I enable notepad?
To Install Notepad in Windows 10,
- Open Settings.
- Navigate to Apps > Apps & features.
- On the right, click on Manage Optional features.
- Click on Add a feature.
- Select Notepad from the list of available features.
- Click on the Install button.
- This will install Notepad.
What plugin means?
Plug-in, also called add-on or extension, computer software that adds new functions to a host program without altering the host program itself. Widely used in digital audio, video, and Web browsing, plug-ins enable programmers to update a host program while keeping the user within the program's environment.
How do I install Notepad?
- Step 1:- Go to the following website: - http://notepad-plus-plus.org/download/v6.6.1.html Step 2:- Click on 'Notepad++ Installer'. ...
- Step 5:- Click 'Next'. ...
- Step 7:-Click 'Next'. ...
- Step 9: - Click 'Install'. ...
- Step 1: Open Notepad++. ...
- Step 5:- Now, you can make the required changes in the 'PartA' file.