Just export the task (right click on the task / Export...) as an XML file (on the Desktop for instance). Then, delete the task in the Tasks Scheduler and right click / Import a task. Choose the previously saved XML file, rename the task and save it. Voila.
- Can you rename a scheduled task?
- How do I rename a task in Windows Task Scheduler?
- How do I change the author of a scheduled task?
- How do I edit scheduled tasks in Windows 10?
Can you rename a scheduled task?
There is no rename task option available in Task Scheduler because that would make the operating system vulnerable to threats. To get a better idea, imagine that a virus starts renaming all your scheduled tasks. Every task you have set and enabled could be changed.
How do I rename a task in Windows Task Scheduler?
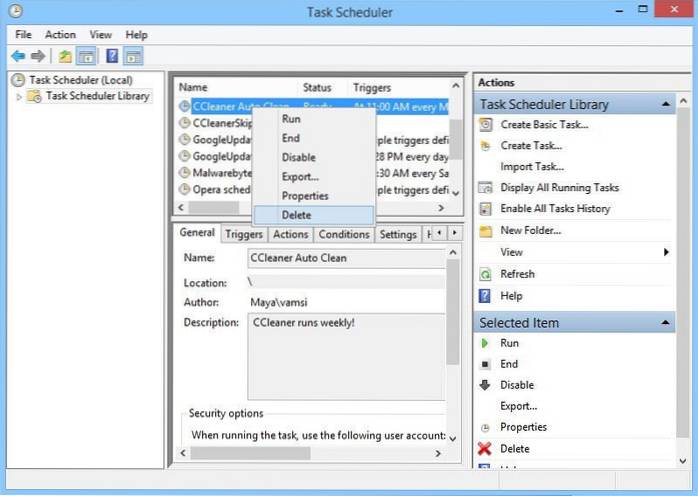
Rename a Scheduled Task in Task Scheduler
- In the Task Scheduler app, find the task you want to rename. ...
- Now, if you rightnclick on the task and select the option “Properties,” you will see the Name field in the General section is greyed out. ...
- To rename the scheduled task, you first need to export the existing task. ...
- The above action will open the Save As window.
How do I change the author of a scheduled task?
Start the Scheduled Tasks application (go to Start, Programs, Administrative Tools, and click Scheduled Tasks). Highlight the name of the scheduled task you want to change, go to the File menu and click Properties, and select the Task tab. In the "Run as" box, type the account name to use.
How do I edit scheduled tasks in Windows 10?
How to change an already created task
- Open Task Scheduler. ...
- Select from the task folder from the console that contains the task you want to change.
- Select the task that you want to change.
- Click on the Properties tab from the Action This will open the Task Properties dialog box.