How to Install and Manage Fonts in Windows 10
- Open the Windows Control Panel.
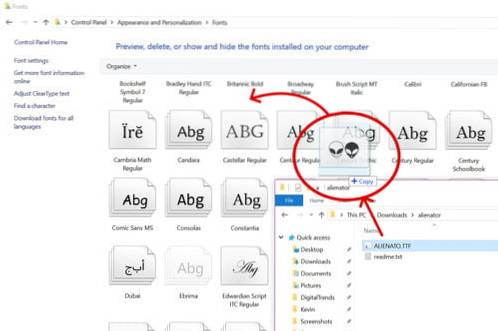
- Select Appearance and Personalization.
- At the bottom, select Fonts. ...
- To add a font, simply drag the font file into the font window.
- To remove fonts, just right click the chosen font and select Delete.
- Click Yes when prompted.
- How do I install new fonts?
- Why can't I install fonts on Windows 10?
- How do I reinstall all fonts in Windows 10?
- How do I get more fonts on my computer?
- How do I install free fonts?
- How do I download a free font?
- How do I install TrueType fonts on Windows 10?
- How do I add Nudi fonts to Windows 10?
- How do I install fonts without admin rights?
- How do I go back to default font?
- What is the default font style for Windows 10?
- How do I restore Windows 10 to default settings?
How do I install new fonts?
Installing a Font on Windows
- Download the font from Google Fonts, or another font website.
- Unzip the font by double-clicking on the . ...
- Open the font folder, which will show the font or fonts you downloaded.
- Open the folder, then right-click on each font file and select Install. ...
- Your font should now be installed!
Why can't I install fonts on Windows 10?
The easiest way to fix all font issues is by using dedicated font management software. To avoid this issue, it's highly advised that you check the integrity of your fonts. In case a specific font won't install on Windows 10, you might have to adjust your security settings.
How do I reinstall all fonts in Windows 10?
How to restore default fonts in Windows 10?
- a: Press Windows key + X.
- b: Then click Control Panel.
- c: Then click Fonts.
- d: Then click Font Settings.
- e: Now click Restore default font settings.
How do I get more fonts on my computer?
Add a font
- Download the font files. ...
- If the font files are zipped, unzip them by right-clicking the .zip folder and then clicking Extract. ...
- Right-click the fonts you want, and click Install.
- If you're prompted to allow the program to make changes to your computer, and if you trust the source of the font, click Yes.
How do I install free fonts?
Windows Vista
- Unzip the fonts first. ...
- From the 'Start' menu select 'Control Panel. ...
- Then select 'Appearance and Personalization. ...
- Then click on 'Fonts. ...
- Click 'File', and then click 'Install New Font. ...
- If you don't see the File menu, press 'ALT'.
- Navigate to the folder that contains the fonts you want to install.
How do I download a free font?
So next time you want to download fonts, head here to discover a world of typographical inspiration.
- FontM. FontM leads on the free fonts but also links to some great premium oferings (Image credit: FontM) ...
- FontSpace. Useful tags help you narrow your search. ...
- DaFont. ...
- Creative Market. ...
- Behance. ...
- Fontasy. ...
- FontStruct. ...
- 1001 Free Fonts.
How do I install TrueType fonts on Windows 10?
To install the TrueType font in Windows:
- Click on Start, Select, Settings and click on Control Panel.
- Click on Fonts, click on File in the main tool bar and select Install New Font.
- Select the folder where the font is located.
- The fonts will appear; select the desired font that is titled TrueType and click on OK.
How do I add Nudi fonts to Windows 10?
Right-click on the app setup file and click on 'properties'. c. Click on the 'compatibility' tab and check the box 'Run this program in compatibility mode for' and select Windows 8/8.1 operating system from the drop down menu and proceed with the installation.
How do I install fonts without admin rights?
How to Install Fonts without Administrator Access
- First, you need to download and install the free PortableApps.com Platform software. ...
- When installing choose “Select a custom location…” (this is required if you don't have administrator access) ...
- Then select a location to install that you have permissions to modify.
How do I go back to default font?
To restore default font settings in Windows 10, do the following.
- Open the classic Control Panel app.
- Go to Control Panel\Appearance and Personalization\Fonts. ...
- On the left, click on the link Font settings.
- On the next page, click on the button 'Restore default font settings'.
What is the default font style for Windows 10?
Windows 10's default system font, Segoe UI, looks pretty nice. However, if you have something better to replace it with, you can change the default system font on your Windows 10 PC. We'll show you how to do this.
How do I restore Windows 10 to default settings?
To reset Windows 10 to its factory default settings without losing your files, use these steps:
- Open Settings.
- Click on Update & Security.
- Click on Recovery.
- Under the "Reset this PC" section, click the Get started button. ...
- Click the Keep my files option. ...
- Click the Next button button.


