Right-click on the Windows taskbar and launch Task Manager. Then switch over to the details tab. Find your process in the list, right-click on it and choose Set affinity from the context menu. You will see by default all apps are allowed to span all the processors in your PC.
- How do I force a program to use more CPU?
- How do I assign CPU cores in Windows 10?
- How do I change the CPU affinity to a program in Windows 10?
- How do I make a program use less CPU?
- How do I set CPU priority?
- How do you limit how much CPU a program can use?
- How do I manage my CPU cores?
- How do I get more CPU usage?
- How many cores do I have?
- How do I make a program high priority in Windows 10 permanently?
- How do you find out which CPU core a process is running on Windows?
- What is hard affinity?
How do I force a program to use more CPU?
Setting CPU Core Usage
- Press the "Ctrl," "Shift" and "Esc" keys on your keyboard simultaneously to open the Task Manager.
- Click the "Processes" tab, then right-click the program you want to change the CPU core usage on and click "Set Affinity" from the popup menu.
How do I assign CPU cores in Windows 10?
How to designate cores to a particular app
- Once Task Manager is launched choose More Details near the bottom.
- Choose the app (that is already running) that you would like to designate cores for.
- Right-click on the app and select Go to details.
- Under details again right-click on the app and now choose Set Affinity.
How do I change the CPU affinity to a program in Windows 10?
How to set Process Affinity in Windows 10
- Right-click on the taskbar.
- Click on the Task Manager option.
- In the Task Manager, switch to the Details tab. ...
- Right-click on the program for which you want to set process affinity.
- Choose Set affinity from the menu.
- It will open the Processor affinity window.
How do I make a program use less CPU?
If your processor has two cores or more you can go to task manager and go to processes and right click on the program name and click Set affinity and set the program to use fewer cores. It will then take longer to do the actions you're asking but will cause a SIGNIFICANT decrease in CPU usage.
How do I set CPU priority?
- Start Task Manager (Right Click on the Start Bar and select Task Manager)
- Click on the Processes tab.
- Right Click on the required process and select "Set Priority"
- You can then select a different priority.
- Close Task Manager.
How do you limit how much CPU a program can use?
The easiest solution I found is to limit Processor power.
- Go to Control Panel.
- Hardware and sound.
- Power options.
- Edit plan settings.
- Change advanced power settings.
- Processor power management.
- Maximum processor state and lower it to 80% or whatever you want.
How do I manage my CPU cores?
Core Settings In Windows 10
Type 'msconfig' into the Windows Search Box and hit Enter. Select the Boot tab and then Advanced options. Check the box next to Number of processors and select the number of cores you want to use (probably 1, if you are having compatibility issues) from the menu. Select OK and then Apply.
How do I get more CPU usage?
How to Use Maximum CPU Power in Windows 10
- Right click the Start menu and select Control Panel.
- Click Hardware and Sound.
- Select Power Options.
- Find Processor power management and open the menu for Minimum processor state.
- Change the setting for on battery to 100%.
- Change the setting for plugged in to 100%.
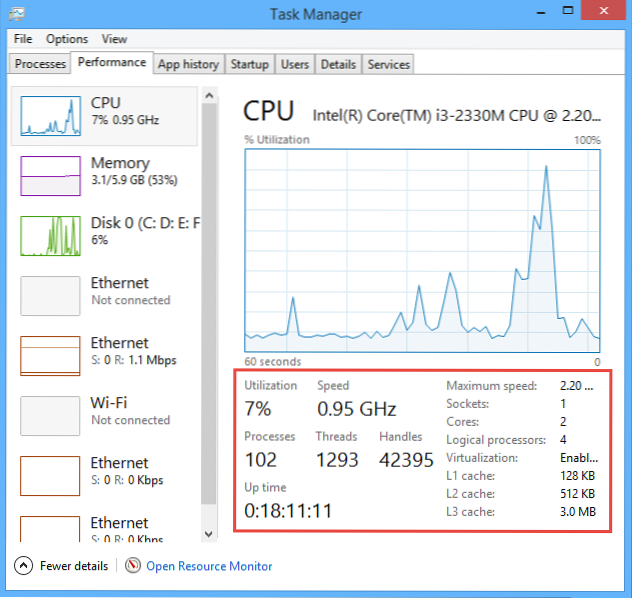
How many cores do I have?
Alternatively you can press Ctrl + Shift + Esc to open Task Manager. Across the top of the window that appears you'll see several tabs. Select Performance and the main pane will change to show the current state of the CPU.
How do I make a program high priority in Windows 10 permanently?
The following steps might be helpful:
- Right-click on taskbar and select Start Task Manager.
- Go to the Processes tab.
- Right-click on the process you want then select Set Priority then switch it to what you want.
How do you find out which CPU core a process is running on Windows?
6 Answers
- Click on the "CPU" tab.
- In the "Processes" section, find the process you want; you can sort by CPU by clicking the "CPU" column header. Check the box next to it.
- Expand the "Services" section below; you will see which specific service is using CPU.
What is hard affinity?
Hard Affinity – Hard Affinity allows a process to specify a subset of processors on which it may run. Some systems such as Linux implements soft affinity but also provide some system calls like sched_setaffinity() that supports hard affinity.