How to Fix a Windows 10 Automatic Repair Loop
- Disconnect or Remove Recently Installed or Connected Devices. ...
- Run System Repair Tools (Chkdsk, SFC) ...
- Run the Windows 10 DISM tool. ...
- Disable Automatic Startup Repair to Limit Boot Loops.
- How do I fix the automatic repair loop in Windows 10?
- How do I get out of the preparing automatic repair loop?
- How do I fix Windows Startup Repair Cannot repair this computer automatically?
- Why is my PC going into automatic repair?
- Why is my PC doing automatic repair?
- How do I get out of diagnosing my computer loop?
- What causes automatic repair loop Windows 10?
- How long does automatic repair Take Windows 10?
- How do I fix my computer if it wont start up?
- How do I fix startup problems?
- What do I do when startup repair takes so long?
How do I fix the automatic repair loop in Windows 10?
- In Command Prompt, type bcdedit /set default recoveryenabled No and press Enter.
- Restart your PC, the Automatic Startup Repair should be disabled and you might be able to access Windows 10 again.
- If you need to again enable it, you can type bcdedit /set default recoveryenabled Yes in CMD and press Enter.
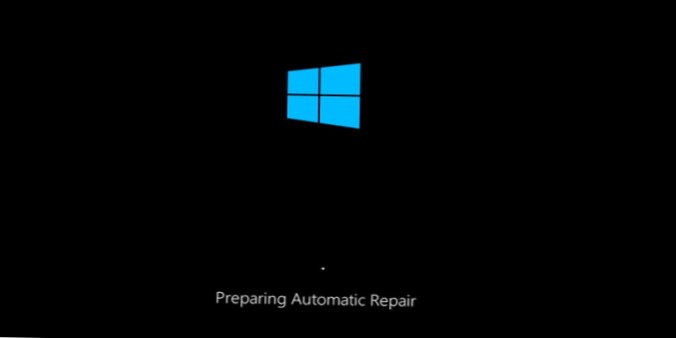
How do I get out of the preparing automatic repair loop?
If your Windows cannot boot because of the "Preparing Automatic Repair" or "Diagnosing your PC" error, you can do a hard reboot.
- Remove the battery and AC adapter.
- Press and hold the power button for 20 seconds and see if it will boot up normally.
How do I fix Windows Startup Repair Cannot repair this computer automatically?
Fix #2: Run chkdsk
- Insert your Windows CD.
- Press any key when “Press any key to boot from CD or DVD” message appears.
- Select Repair your computer after you select the language, time and keyboard method.
- Select your Windows install drive, which is usually C:\
- Click Next.
Why is my PC going into automatic repair?
If the computer fails to start properly for two consecutive times, then Automatic Repair will be triggered as a system's response to rectify the booting issue. ... This goes with the blue screen or black screen error causing complete inaccessibility of booting issues in the system.
Why is my PC doing automatic repair?
A bad system update, a new graphics card, corrupted system files, even a fresh USB mouse—any of these can cause a dreaded Windows 10 automatic repair loop to occur when you're trying to boot up a Windows PC. ... If Windows can't repair itself, it reboots and repeats the cycle.
How do I get out of diagnosing my computer loop?
Press the F8 key repeatedly as soon as you see the initial screen. Doing this will eventually take you to the Advanced Boot Options menu. After the command is successfully processed, restart your computer to boot up normally. At the next startup sequence, you should no longer see the Automatic repair loop.
What causes automatic repair loop Windows 10?
The main cause of Windows 10 Automatic Repair loop issue might be the corrupted or damaged Windows 10 ISO files. Specifically, other factors such as malfunctioning hard drives, missing registry keys or even complex malicious rootkits might cause the issue.
How long does automatic repair Take Windows 10?
And then you'll need to click Advanced options. 2. Click Startup Repair. Windows will take anywhere from a few seconds to a few minutes to attempt to fix the problem.
How do I fix my computer if it wont start up?
What to Do When Your Computer Won't Start
- Give 'er More Power. ...
- Check Your Monitor. ...
- Listen for the Message at the Beep. ...
- Unplug Unnecessary USB Devices. ...
- Reseat the Hardware Inside. ...
- Explore the BIOS. ...
- Scan for Viruses Using a Live CD. ...
- Boot Into Safe Mode.
How do I fix startup problems?
First, power the computer completely down. Next, turn it on and keep pressing the F8 key as it boots. You'll see the Advanced Boot Options screen, which is where you would launch Safe Mode from. Select “Repair Your Computer” and run startup repair.
What do I do when startup repair takes so long?
- Restart your computer.
- Start pressing F8 repeatedly until the Startup Options screen is displayed.
- Select Safe Mode with prompt .
- When prompt appears, type the subsequent command: sfc /scannow /offbootdir=d:\ /offwindir=d:\windows.
- Press Enter and restart your computer after the method.